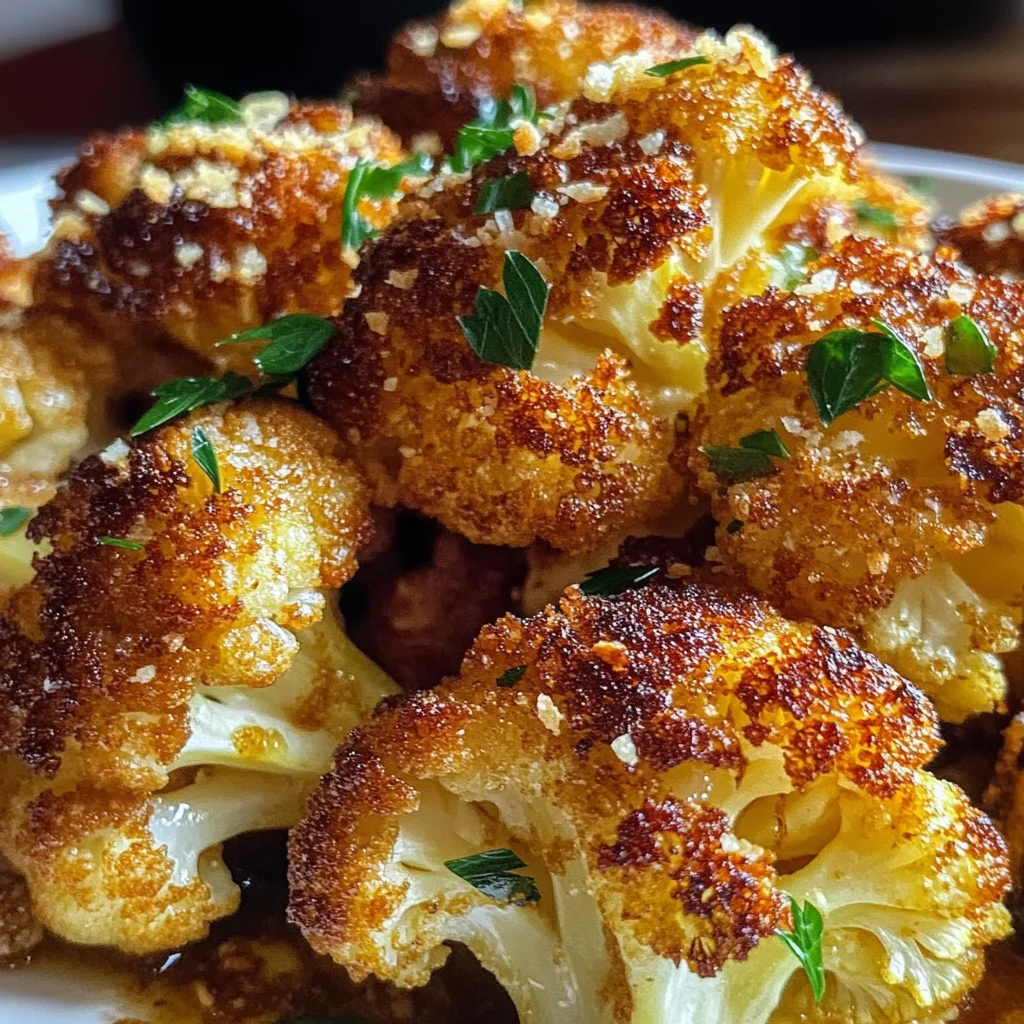
Crispy Roasted Cauliflower
If you’re looking for a delightful dish that’s both crunchy and packed with flavor, you’ve come to the right place! Crispy Roasted Cauliflower is one of those recipes that never fails to impress. Whether you’re whipping it up for a busy weeknight dinner or serving it at a family gathering, this dish has a way of bringing joy to the table. Plus, it’s so easy to make that you’ll find yourself reaching for it time and again!
What makes this Crispy Roasted Cauliflower recipe special is its versatility. It’s not just a side; it can shine as a snack or even as part of a larger spread. Trust me—once you try it, you’ll understand why it’s become a beloved favorite in my kitchen.
Why You’ll Love This Recipe
- Quick and Easy: With just a few simple steps, you can have a delicious side ready in under 35 minutes!
- Family-Friendly: Even picky eaters will love the crispy texture and savory flavors—it’s a hit with kids and adults alike.
- Customizable: Feel free to adjust the spices or add your favorite toppings to make this dish your own.
- Make Ahead: Prepping this dish ahead of time means less stress when entertaining guests or during hectic weeknights.
- Nutrient-Packed: Cauliflower is full of vitamins and minerals, making this dish not only tasty but also healthy!
Ingredients You’ll Need
These are simple, wholesome ingredients that you probably already have in your pantry! Let’s gather everything we need for our Crispy Roasted Cauliflower.
For the Cauliflower
- 1 head Cauliflower, cut into florets
- 3 tablespoons Olive oil
- 1/2 cup Panko breadcrumbs
- 1/4 cup Grated Parmesan cheese (optional; feel free to omit for a vegan version)
- 1 teaspoon Smoked paprika
- 1 teaspoon Garlic powder
- to taste Salt and black pepper
Variations
One of the best things about this recipe is how flexible it is. You can easily swap in different flavors or ingredients based on what you have at home or your personal preferences!
- Add some heat: Toss in a pinch of red pepper flakes for a spicy kick.
- Change up the cheese: Try nutritional yeast instead of Parmesan for a cheesy flavor without dairy.
- Mix in some herbs: Fresh herbs like parsley or thyme can elevate the dish with added freshness.
- Experiment with spices: Go bold by adding curry powder or Italian seasoning for an exciting twist.
How to Make Crispy Roasted Cauliflower
Step 1: Preheat Your Oven
Preheat your oven to 425°F (220°C) and prepare your baking sheet with parchment paper or light greasing. A hot oven ensures that your cauliflower gets that perfect golden-brown crispiness we all love!
Step 2: Prepare the Cauliflower
Wash and thoroughly dry your cauliflower before cutting it into medium-sized florets. Drying is essential because moisture can prevent them from roasting properly and achieving that desired crunch.
Step 3: Coat with Olive Oil
In a large bowl, toss the florets with olive oil until they are evenly coated. This step helps the seasonings stick and contributes to that deliciously crispy texture as they roast.
Step 4: Season It Up
Sprinkle smoked paprika, garlic powder, salt, and black pepper over the cauliflower. Mix well! These spices add layers of flavor that complement the natural nuttiness of cauliflower beautifully.
Step 5: Add Crunchy Panko
Toss in panko breadcrumbs and grated Parmesan cheese (if using). Stir until every floret is well-coated. The panko gives that irresistible crunch we’re after!
Step 6: Roast Away!
Spread your coated cauliflower on the prepared baking sheet in a single layer, making sure there’s space between each floret. Roast in your preheated oven for 20-25 minutes, flipping halfway through. This ensures an even roast and maximum crispiness.
Step 7: Serve and Enjoy!
Once golden brown, remove from the oven and let cool slightly before serving. Enjoy hot as a snack, side dish, or part of any meal spread! I promise—it’ll be hard to resist going back for seconds!
Pro Tips for Making Crispy Roasted Cauliflower
Getting that perfect crunch takes a little finesse, but with these tips, you’ll be a crispy cauliflower pro in no time!
- Choose Fresh Cauliflower: Using fresh, firm cauliflower florets will ensure they roast evenly and develop a delightful texture.
- Don’t Skip Drying: After washing, make sure to dry the cauliflower completely. Excess moisture can prevent it from becoming crispy during roasting.
- Use High Heat: Roasting at 425°F (220°C) is key to achieving that golden-brown crunch. The higher temperature helps caramelize the outside while keeping the inside tender.
- Space It Out: Avoid overcrowding the baking sheet. Giving each floret space allows hot air to circulate, making them crispier instead of steaming.
- Experiment with Spices: Feel free to get creative with different spice blends or herbs! This recipe is a great base, so try adding cumin or even some chili powder for a kick.
How to Serve Crispy Roasted Cauliflower
Crispy Roasted Cauliflower is not only delicious but also versatile! Here are some ideas on how to present it for maximum enjoyment.
Garnishes
- Fresh Herbs: Sprinkle chopped parsley or cilantro on top just before serving for a burst of color and freshness.
- Lemon Zest: A light dusting of lemon zest adds brightness and enhances the flavors beautifully.
- Chili Flakes: For those who enjoy a bit of heat, add a pinch of chili flakes to give your dish an extra kick.
Side Dishes
- Quinoa Salad: A refreshing quinoa salad with cucumbers and cherry tomatoes makes for a light and nutritious pairing that complements the roasted cauliflower well.
- Garlic Mashed Potatoes: Creamy garlic mashed potatoes provide a comforting contrast to the crispy texture of the cauliflower, making it a hearty meal option.
- Grilled Asparagus: The slightly charred flavor of grilled asparagus pairs wonderfully with roasted cauliflower; both vegetables highlight each other’s natural tastes beautifully.
- Hummus Platter: Serve alongside a colorful hummus platter with assorted veggies and pita bread for an inviting appetizer spread that’s perfect for gatherings.
With these serving suggestions and pro tips, your Crispy Roasted Cauliflower will not only impress your loved ones but also become a beloved staple in your home! Enjoy every crunchy bite!

Make Ahead and Storage
Crispy Roasted Cauliflower is a fantastic dish for meal prep! You can easily make it ahead of time and store it for quick, flavorful meals throughout the week.
Storing Leftovers
- Allow the roasted cauliflower to cool completely before storing.
- Place it in an airtight container and refrigerate for up to 3 days.
- For best results, try to keep the cauliflower in a single layer if possible.
Freezing
- Let the crispy cauliflower cool completely before freezing.
- Spread the florets on a baking sheet in a single layer and freeze until solid.
- Transfer the frozen cauliflower to a freezer-safe bag or container. It will keep well for up to 2 months.
Reheating
- Preheat your oven to 375°F (190°C).
- Spread the leftover cauliflower on a baking sheet and reheat for about 10-15 minutes, or until heated through and crispy again.
- Alternatively, you can microwave it for about 1-2 minutes but note that this may soften the texture.
FAQs
Got questions? Here are some answers to help you with your Crispy Roasted Cauliflower journey!
Can I make Crispy Roasted Cauliflower without cheese?
Absolutely! You can omit the Parmesan cheese for a delicious vegan version that still packs a flavorful punch.
What do I serve with Crispy Roasted Cauliflower?
This dish pairs wonderfully with grains like quinoa or brown rice, or alongside dips like hummus. It also makes a great side to any main course!
How do I achieve extra crispiness with my Crispy Roasted Cauliflower?
Make sure your cauliflower florets are dry before tossing them in oil and breadcrumbs. High heat during roasting also helps achieve that perfect crispy texture.
Final Thoughts
I hope you’re as excited as I am about making Crispy Roasted Cauliflower! This recipe is not only easy but also incredibly versatile—perfect as a snack or side dish. I can’t wait for you to enjoy this delightful crunch in every bite. Happy cooking, and remember, there are no wrong ways to enjoy your roasted veggies!
Crispy Roasted Cauliflower

Crispy Roasted Cauliflower is a delightful and versatile dish that offers both crunch and flavor in every bite. Perfect for busy weeknights or family gatherings, this easy-to-make recipe will quickly become a favorite in your home. With its golden-brown exterior and tender interior, this dish can be enjoyed as a healthy snack, a zesty side for your main course, or even as part of a larger spread. Plus, it’s customizable, allowing you to experiment with spices and toppings to suit your taste.
- Prep Time: 10 minutes
- Cook Time: 25 minutes
- Total Time: 35 minutes
- Yield: Serves approximately 4 people 1x
- Category: Side Dish
- Method: Baking
- Cuisine: Vegetarian
Ingredients
- 1 head cauliflower, cut into florets
- 3 tablespoons olive oil
- 1/2 cup panko breadcrumbs
- 1 teaspoon smoked paprika
- 1 teaspoon garlic powder
- Salt and black pepper to taste
Instructions
- Preheat the oven to 425°F (220°C) and line a baking sheet with parchment paper.
- Wash and thoroughly dry the cauliflower florets before cutting them into medium-sized pieces.
- In a bowl, toss the florets with olive oil until evenly coated.
- Season with smoked paprika, garlic powder, salt, and black pepper; mix well.
- Add panko breadcrumbs and stir until all florets are coated.
- Spread the cauliflower on the prepared baking sheet in a single layer.
- Roast for 20-25 minutes, flipping halfway through until golden brown and crispy.
- Serve hot and enjoy!
Nutrition
- Serving Size: 1 cup (140g)
- Calories: 180
- Sugar: 2g
- Sodium: 360mg
- Fat: 10g
- Saturated Fat: 1g
- Unsaturated Fat: 9g
- Trans Fat: 0g
- Carbohydrates: 20g
- Fiber: 5g
- Protein: 4g
- Cholesterol: 0mg