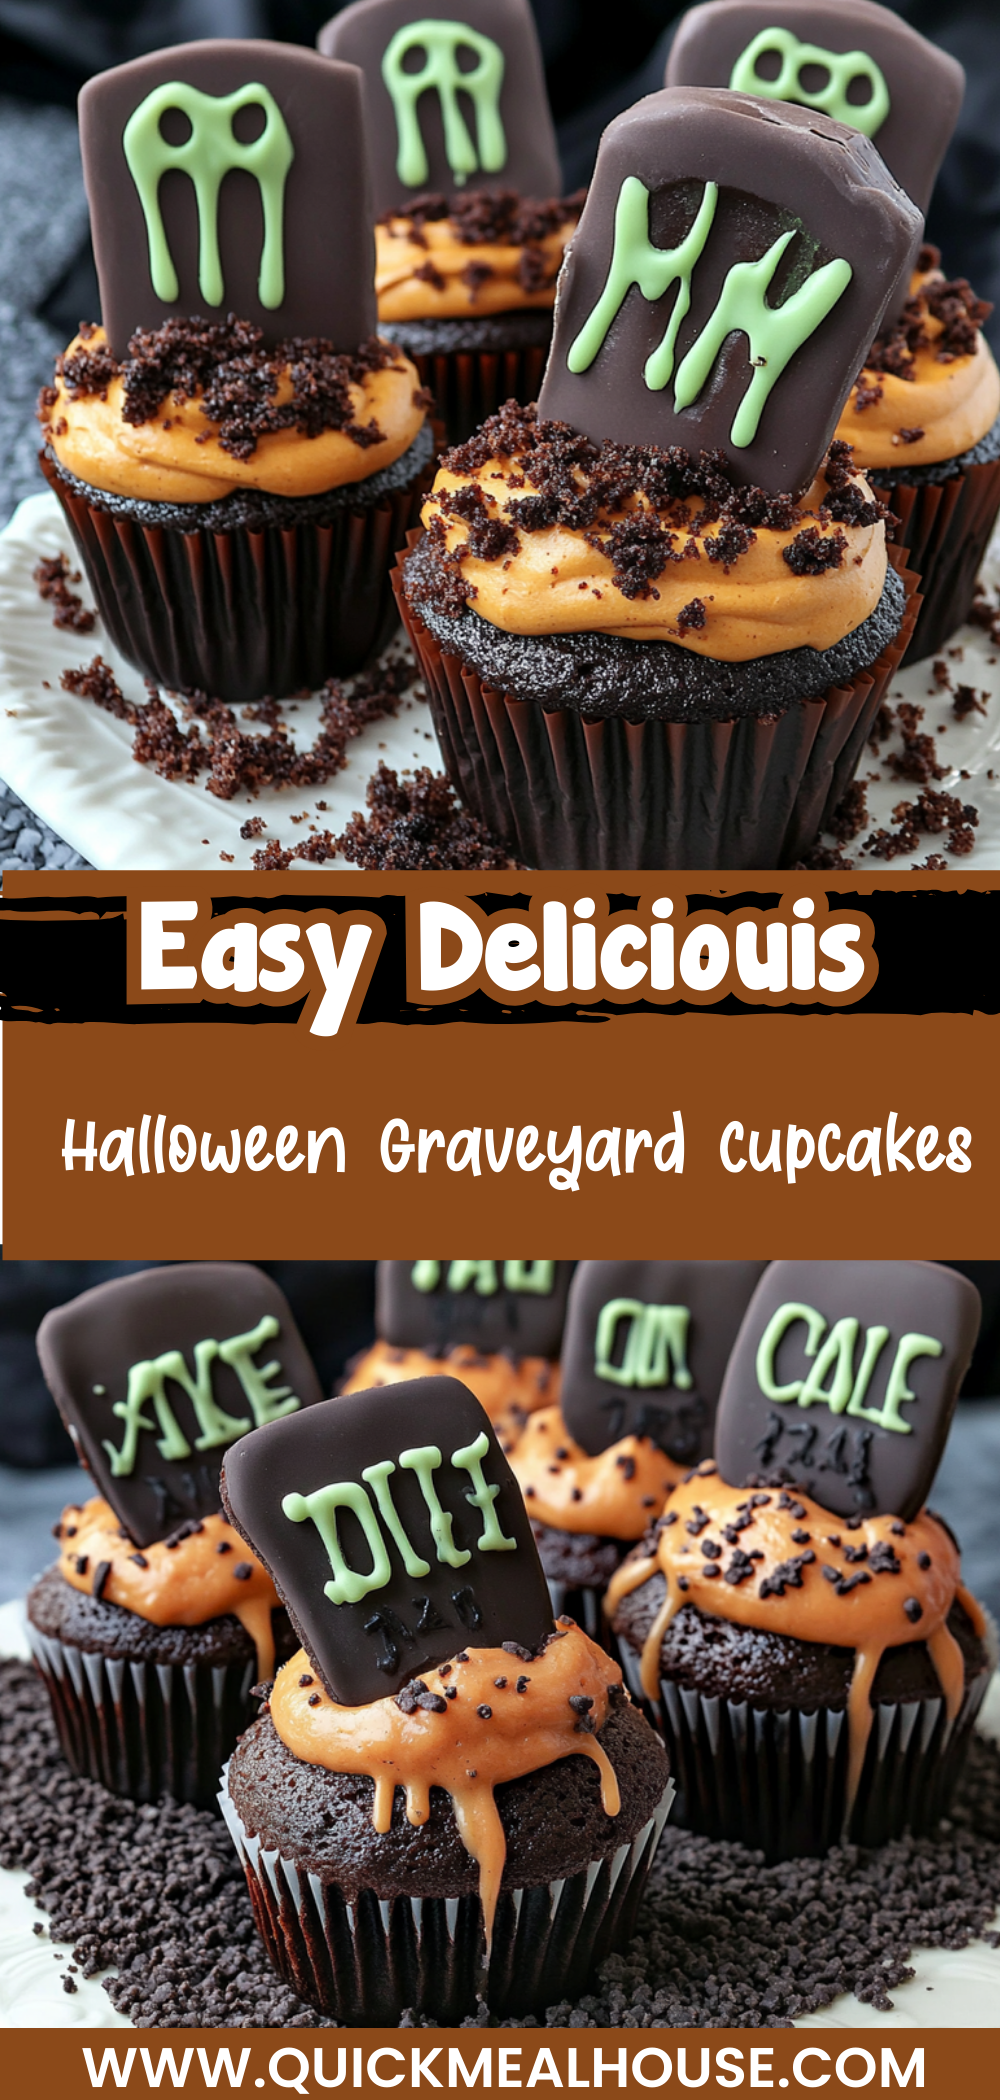
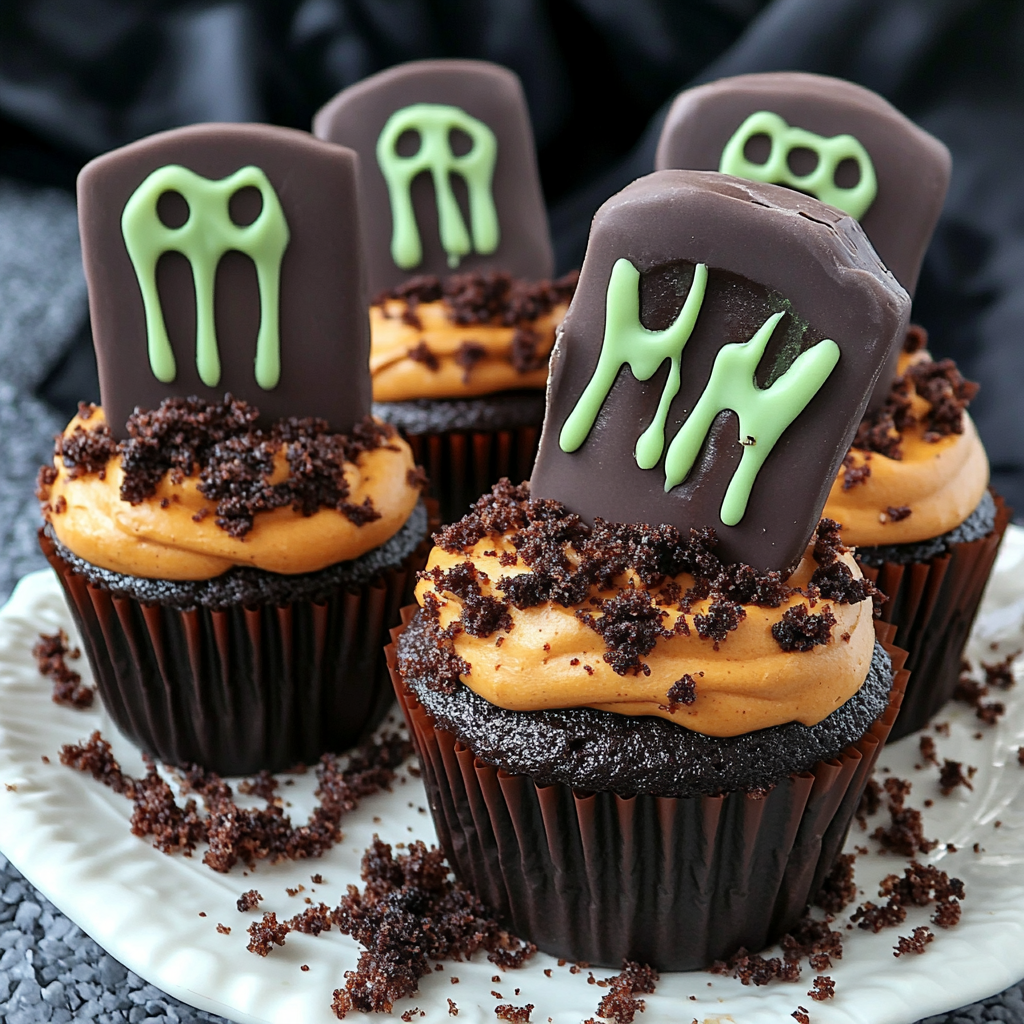
Spooktacular Halloween Graveyard Cupcakes Recipe
There’s something magical about Halloween that brings out the creativity in all of us. As the leaves change color and the air turns crisp, it’s the perfect time to whip up some delightful treats. That’s why I adore these Halloween Graveyard Cupcakes! They are not only delicious but also look incredibly fun and festive. Picture a chocolate cupcake adorned with an Oreo cheesecake filling, topped with luscious buttercream and finished off with a cute Biscoff biscuit gravestone. These cupcakes are perfect for Halloween parties, school events, or simply to indulge your sweet tooth while enjoying a spooky movie night at home.
What I love most about these cupcakes is their versatility. Whether you’re hosting a gathering or just want to treat your family to something special, these Halloween Graveyard Cupcakes will definitely steal the show.
Why You’ll Love This Recipe
– Fun presentation: The spooky graveyard theme adds a playful touch that kids and adults alike will enjoy.
– Deliciously rich flavors: The combination of chocolate, cream cheese, and Oreos creates an indulgent treat you won’t forget.
– Customizable: You can easily modify decorations to fit different themes or personal preferences.
– Perfect for sharing: With 12 servings, they’re ideal for parties or gatherings where you want to impress your guests.
– Easy to make: With straightforward steps, even novice bakers can try their hand at creating these delightful cupcakes.
Ingredients You’ll Need
Gathering the right ingredients is essential for baking success. Here’s what you’ll need to create these delectable Halloween Graveyard Cupcakes:
For the Cupcakes
– 175 g Baking spread or butter (softened, unsalted)
– 175 g Caster sugar
– 3 Eggs (large)
– 2 tbsp Milk
– 150 g Self raising flour
– 25 g Cocoa powder
– 1/4 tsp Baking powder
For the Oreo Cheesecake Filling
– 115 g Full fat cream cheese
– 15 g Icing sugar
– 15 g Oreos (crushed)
– 1/8 tsp Vanilla extract
For the Chocolate Buttercream
– 100 g Butter (softened, unsalted)
– 165 g Icing sugar
– 35 g Cocoa powder
– 1-2 tsp Milk
For the Green Grass Buttercream
– 25 g Butter (softened, unsalted)
– 50 g Icing sugar
– 1/8 tsp Vanilla extract
– Green food colouring
Decorations
– 12 Lotus biscoff biscuits
– 150 g Dark chocolate (melted)
– 30 g White chocolate (melted)
– 15 g Oreos (crushed)
Variations
One of the best parts about baking is making recipes your own! Here are some fun variations you might consider:
– Swap the filling: Instead of Oreo cheesecake filling, try using a chocolate mousse or vanilla pudding for a different flavor profile.
– Change the toppings: Add gummy worms or edible eyeballs for an extra spooky touch!
– Use different biscuits: If you can’t find Biscoff biscuits, any sturdy cookie would work well as a gravestone.
– Experiment with colors: Use different food coloring shades for unique “grass” effects on top of your cupcakes.
How to Make Halloween Graveyard Cupcakes
Step 1: Prepare the Biscuit Graves
Start by making the biscuit graves. Snap about a third of each Lotus biscoff biscuit off at one end; this gives them a shorter height that’s just right for your cupcakes. Melt the dark chocolate and dip each biscuit into it before placing them onto baking paper to set. This step not only secures your biscuits but also adds that delightful chocolatey flavor!
Step 2: Decorate Your Biscuits
Once the dark chocolate has set, it’s time to get creative! Melt your white chocolate and transfer it into a piping bag. Pipe fun designs onto each biscuit gravestone to personalize them further. Allow these decorated biscuits to set completely before moving on.
Step 3: Preheat Your Oven
Preheat your oven to 140C Fan/160C/325F/Gas Mark 3 and line a cupcake tin with cupcake cases. This ensures that when you’re ready to bake, everything is perfectly prepared!
Step 4: Make the Cupcake Batter
In a mixing bowl, combine the softened baking spread and caster sugar using an electric whisk or stand mixer fitted with a paddle attachment for about five minutes until light and fluffy. This step is crucial as it incorporates air into your batter for fluffy cupcakes.
Step 5: Add Eggs and Milk
Add in your eggs and milk into the mixture and whisk until well combined. Ensuring everything is mixed well here helps create an even texture throughout your cupcakes.
Step 6: Fold in Dry Ingredients
Gently fold in self raising flour, cocoa powder, and baking powder until just combined. Be careful not to overmix; this will keep your cupcakes tender.
Step 7: Fill Cupcake Cases
Divide the batter evenly between your lined cupcake cases. Fill them approximately two-thirds full to allow room for rising during baking.
Step 8: Bake
Bake in your preheated oven for about 25–30 minutes or until a skewer inserted into the center comes out clean. Once baked, transfer them to a wire rack and let them cool completely.
Step 9: Prepare Oreo Cheesecake Filling
While waiting for your cupcakes to cool, mix together cream cheese, icing sugar, and vanilla extract until smooth in texture. Stir in crushed Oreos gently—this filling will be heavenly!
Step 10: Core Your Cupcakes
Using either a cupcake corer or knife, carefully make holes in each cooled cupcake’s center. This creates space for that delicious cheesecake filling!
Step 11: Fill with Cream Filling
Fill each hole with your Oreo cheesecake mixture using either a spoon or piping bag for neatness—this adds such an exciting surprise when biting into them!
Step 12: Make Chocolate Buttercream
For decadent frosting, mix together softened butter with cocoa powder and icing sugar before adding milk until smooth. Using a stand mixer helps achieve that luscious consistency!
Step 13: Create Green Grass Buttercream
To make grass buttercream, mix softened butter with icing sugar along with vanilla extract and green food coloring until you reach your desired shade—it’s like painting on frosting art!
Step 14: Frost Each Cupcake
Pipe chocolate buttercream generously onto each cupcake using a round nozzle piping bag; then smooth out tops gently using a palette knife.
Step 15 &16: Add Gravestones & Soil
Carefully push one of your chocolate-covered biscuit gravestones into each cupcake’s top and sprinkle crushed Oreos around as soil—it’s important as it completes that graveyard look!
Step 17: Finish with Grass
Using green buttercream in another piping bag fitted with a multi-opening grass nozzle pipe grass around each gravestone for added realism—or use spoons for texture if preferred.
Step 18: Store
Store any leftover cupcakes in an airtight container in a cool place; however, be sure they’re enjoyed within three days because trust me—they won’t last long!
And there you have it! Enjoy making these Halloween Graveyard Cupcakes; they are bound to be both fun and delicious!
Pro Tips for Making Halloween Graveyard Cupcakes
Making Halloween Graveyard Cupcakes should be a fun and creative experience! Here are some tips to help you nail this spooky treat:
– Use room temperature ingredients: Ensure your butter, eggs, and cream cheese are at room temperature for smoother mixing and a better texture in your cupcakes.
– Don’t overmix the batter: When combining your dry ingredients with the wet ones, mix just until combined. Overmixing can lead to dense cupcakes.
– Experiment with decorations: Feel free to get creative with the designs on your biscuit gravestones. Different shapes or messages can add a personal touch that will wow your guests!
– Let your cupcakes cool completely: Before adding the fillings and frostings, make sure your cupcakes are completely cooled to avoid melting your delicious decorations.
– Keep it simple: If you’re short on time, consider using store-bought chocolate frosting instead of making your own. It still tastes great and saves time!
How to Serve Halloween Graveyard Cupcakes
When it comes to presenting your Halloween Graveyard Cupcakes, let your creativity run wild! These festive delights can be showcased in various ways that will surely impress.
Garnishes
– Edible glitter: A sprinkle of edible glitter can add an enchanting sparkle that perfectly complements the spooky theme.
– Candy spiders: Small plastic or gummy spiders perched on top of the cupcakes can enhance the graveyard effect.
Side Dishes
– Pumpkin soup: A warm bowl of pumpkin soup makes a cozy companion to these sweet treats.
– Witch’s brew punch: Serve a fun, fruity drink alongside these cupcakes for an extra festive touch.
– Cheese platter: A selection of cheeses and crackers can balance out the sweet flavors with savory bites.
Make Ahead and Storage
If you want to save time on Halloween day, these cupcakes can be prepped ahead! Here’s how to store them properly:
Storing Leftovers
– Place leftover cupcakes in an airtight container at room temperature for up to 3 days. Avoid refrigerating unless necessary, as this can dry them out.
Freezing
– To freeze, wrap each cupcake individually in plastic wrap and place them in a freezer-safe container. They’ll stay fresh for up to 2 months.
Reheating
– Thaw frozen cupcakes overnight in the fridge before bringing them back to room temperature. For a quick warm-up, pop them in a microwave for about 10 seconds.
FAQs
You might have some questions about making these delightful cupcakes. Here are some common queries answered!
Can I use different fillings?
Absolutely! Feel free to experiment with other fillings like fruit preserves or whipped cream if you prefer something different than cheesecake.
How do I prevent my cupcakes from sinking?
Ensure that you’re not overmixing the batter and that all ingredients are measured accurately. Also, make sure your baking powder is fresh!
Can I decorate these cupcakes in advance?
Yes! You can frost and decorate the cupcakes a day before serving; just store them in an airtight container at room temperature.
Final Thoughts
I hope you’re excited to try making these Halloween Graveyard Cupcakes! They’re not only delicious but also bring a delightful spookiness perfect for any Halloween gathering. Enjoy every step of the process, and remember—it’s all about having fun while creating something special. Happy baking!
Halloween Graveyard Cupcakes
Ingredients
Method
- Prepare the biscuit graves by snapping a third of each Lotus biscoff biscuit off at one end, dip in melted dark chocolate, and set on baking paper.
- Once the dark chocolate has set, melt white chocolate and pipe designs onto each biscuit gravestone.
- Preheat your oven to 140C Fan/160C/325F/Gas Mark 3 and line a cupcake tin with cases.
- In a mixing bowl, combine softened baking spread and caster sugar until light and fluffy.
- Add in eggs and milk, whisk until well combined.
- Fold in self raising flour, cocoa powder, and baking powder until just combined.
- Divide the batter evenly between lined cupcake cases, filling them two-thirds full.
- Bake for about 25–30 minutes or until a skewer comes out clean, then cool completely.
- Mix cream cheese, icing sugar, and vanilla extract until smooth, then stir in crushed Oreos.
- Core each cooled cupcake's center to create space for the cheesecake filling.
- Fill each hole with Oreo cheesecake mixture using a spoon or piping bag.
- Mix softened butter with cocoa powder and icing sugar, adding milk until smooth for chocolate buttercream.
- Mix softened butter with icing sugar, vanilla extract, and green food coloring for grass buttercream.
- Pipe chocolate buttercream onto each cupcake and smooth the tops.
- Push a chocolate-covered biscuit gravestone into each cupcake and sprinkle crushed Oreos around as soil.
- Pipe green buttercream around each gravestone for added realism.
- Store leftover cupcakes in an airtight container and enjoy within three days.