Garlic Herb Dutch Oven Bread Recipe You’ll Love Today!
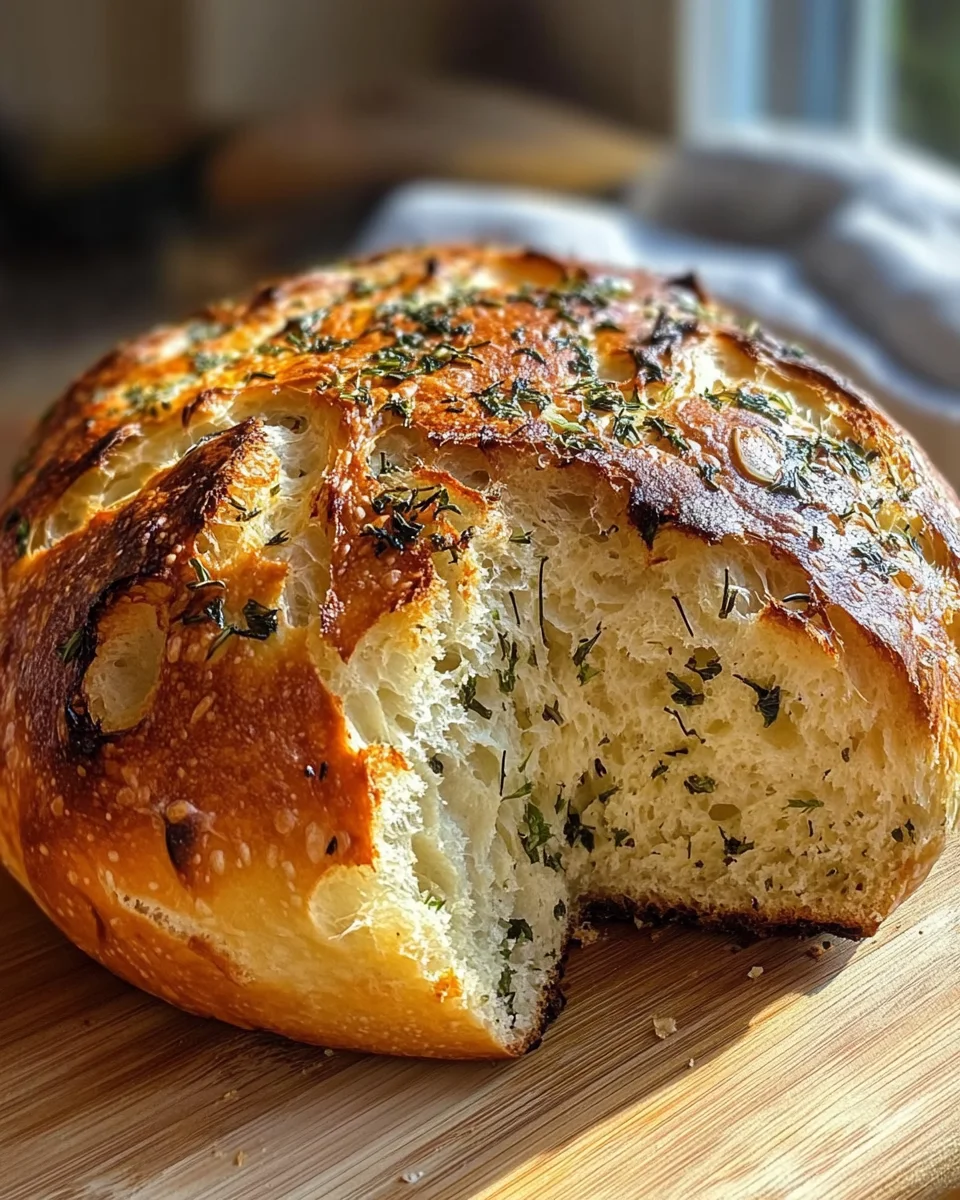
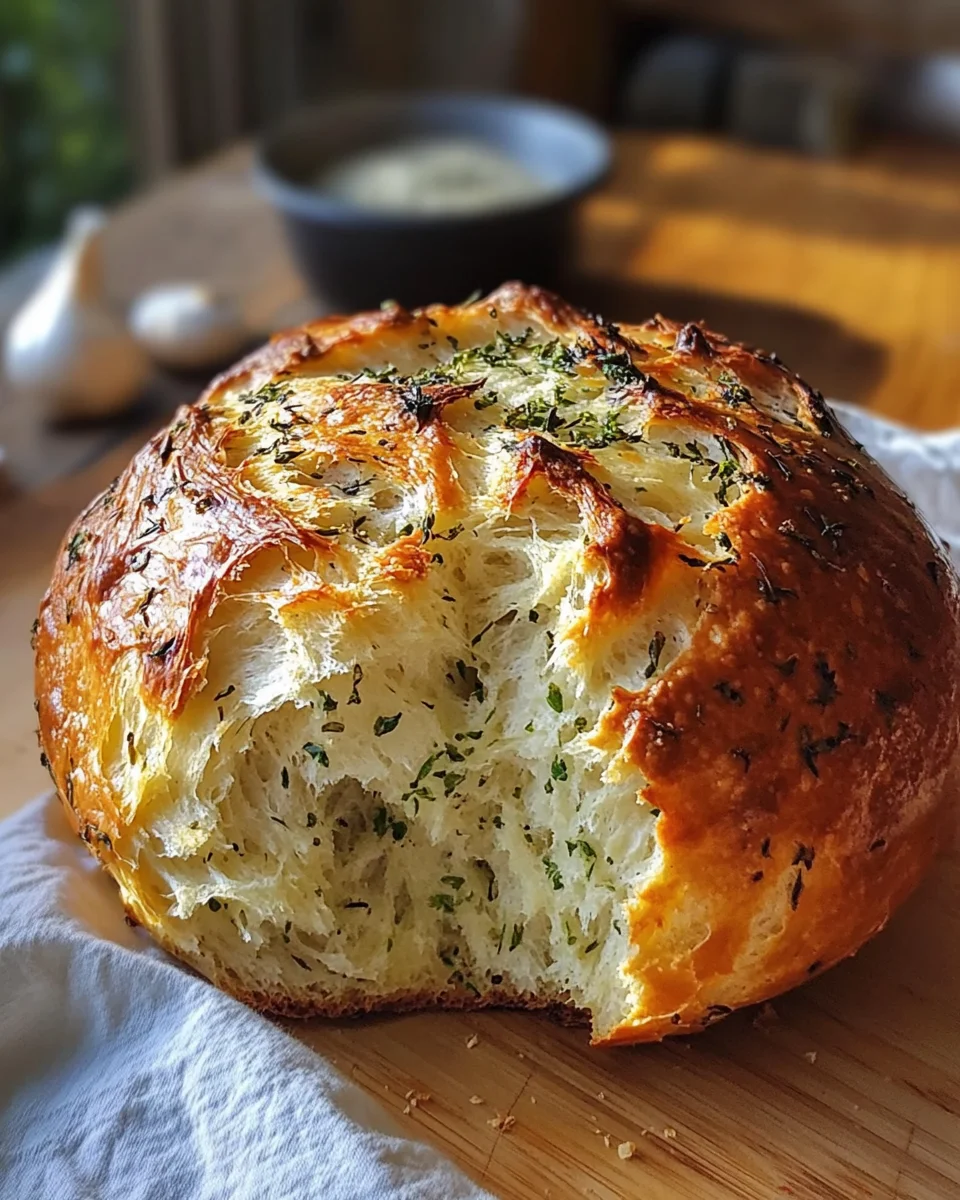
Garlic Herb Dutch Oven Bread Recipe You’ll Love Today! This easy and flavorful bread is the perfect addition to any meal, whether it’s a cozy family dinner or a festive gathering. With its golden crust and aromatic garlic and herbs, this bread will impress your guests and make your home smell delightful. Baking it in a Dutch oven ensures a crusty exterior while keeping the inside soft and airy.
Why You’ll Love This Recipe
- Easy to Make: With minimal ingredients and straightforward steps, this recipe is beginner-friendly.
- Flavor Packed: The combination of garlic and fresh herbs creates a mouth-watering aroma and taste.
- Versatile: This bread pairs well with soups, salads, or as a standalone snack with butter.
- Perfect for Any Occasion: Ideal for family dinners, potlucks, or simply enjoying at home.
- Long Resting Time: The long resting period enhances the flavor without requiring constant attention.
Tools and Preparation
Before diving into the baking process, gather your tools. Having everything ready makes cooking smooth and enjoyable.
Essential Tools and Equipment
- Dutch oven
- Mixing bowl
- Plastic wrap
- Wooden spoon or spatula
- Measuring cups and spoons
Importance of Each Tool
- Dutch oven: Essential for achieving that perfect crust while retaining moisture within the bread.
- Mixing bowl: A spacious bowl allows for easy mixing of ingredients without mess.
- Plastic wrap: Helps retain moisture during the resting period, crucial for flavor development.
Ingredients
A delicious and easy-to-make garlic herb bread baked in a Dutch oven, perfect for any meal.
Dry Ingredients
- 3 cups all-purpose flour
- 1 1/2 teaspoons salt
- 1/2 teaspoon instant yeast
Wet Ingredients
- 1 1/2 cups warm water
- 1 tablespoon olive oil
Flavor Enhancers
- 4 cloves garlic, minced
- 2 tablespoons fresh herbs (such as rosemary and thyme), chopped
How to Make Garlic Herb Dutch Oven Bread Recipe You’ll Love Today!
Step 1: Mix the Dry Ingredients
In a large bowl, mix together the flour, salt, and instant yeast until well combined.
Step 2: Add Wet Ingredients
Add the warm water, minced garlic, and chopped herbs to the dry mixture. Stir until everything is combined into a shaggy dough.
Step 3: Let It Rest
Cover the bowl with plastic wrap. Allow it to rest at room temperature for 12-18 hours. This long rest time develops flavor and texture.
Step 4: Preheat Your Oven
After resting, preheat your oven to 450°F (230°C). Place your empty Dutch oven inside to heat up as well.
Step 5: Prepare the Dough
Once heated, carefully remove the Dutch oven. Drizzle olive oil at the bottom. Transfer your dough onto a floured surface; shape it into a ball.
Step 6: Bake Covered
Place the dough in the hot Dutch oven. Cover it with the lid and bake for 30 minutes.
Step 7: Bake Uncovered
Remove the lid after 30 minutes. Bake for an additional 15-20 minutes until golden brown on top.
Step 8: Cool Before Slicing
Let your bread cool on a wire rack before slicing. This step is important to ensure it holds its shape when cut.
Enjoy this delightful Garlic Herb Dutch Oven Bread that you’ll love today! Perfectly paired with any meal or enjoyed simply with butter.
How to Serve Garlic Herb Dutch Oven Bread Recipe You’ll Love Today!
This Garlic Herb Dutch Oven Bread is not just a side; it can be the star of your meal! Perfectly crusty on the outside and soft on the inside, it pairs well with a variety of dishes. Here are some delightful serving suggestions to enhance your dining experience.
With Olive Oil and Balsamic Vinegar
- Drizzle high-quality olive oil and balsamic vinegar for a simple yet elegant appetizer.
Accompanied by Soup
- Serve alongside a warm bowl of tomato basil or creamy potato soup for a comforting meal.
As a Sandwich Base
- Use slices of this bread as the base for hearty sandwiches filled with meats, cheeses, and vegetables.
Topped with Butter and Herbs
- Spread softened butter infused with herbs onto warm slices for an extra flavor boost.
Paired with Cheese Platter
- Add to a cheese platter with assorted cheeses, fruits, and nuts for an entertaining spread.
How to Perfect Garlic Herb Dutch Oven Bread Recipe You’ll Love Today!
To ensure your bread turns out perfectly every time, follow these helpful tips.
- Use fresh ingredients: Fresh garlic and herbs enhance the flavor significantly. Opt for the best quality you can find.
- Measure accurately: Proper measurements are key in baking. Use a kitchen scale for precision.
- Let it rest: Allowing the dough to rise overnight improves the texture and flavor of your bread.
- Preheat properly: Ensure your oven and Dutch oven are fully preheated before baking for an even crust.
- Experiment with herbs: Don’t hesitate to mix different herbs to create unique flavors tailored to your taste.
- Cool before slicing: Letting the bread cool completely before slicing helps maintain its structure and moisture.
Best Side Dishes for Garlic Herb Dutch Oven Bread Recipe You’ll Love Today!
This garlic herb bread complements many dishes beautifully. Here are some ideal side dishes you can serve alongside it.
- Caesar Salad: A classic Caesar salad with crisp romaine, croutons, and creamy dressing pairs perfectly.
- Grilled Vegetables: Charred seasonal vegetables bring out the earthy flavors that complement the bread.
- Chili Con Carne: A spicy bowl of chili adds warmth and richness that balances well with the garlic herb flavors.
- Stuffed Bell Peppers: Colorful bell peppers filled with rice, beans, and spices make a healthy side option.
- Roasted Potatoes: Crispy roasted potatoes seasoned with herbs echo the flavors in the bread while providing crunch.
- Caprese Salad: Fresh mozzarella, tomatoes, and basil drizzled with olive oil create a refreshing contrast to the bread’s richness.
Common Mistakes to Avoid
When making the Garlic Herb Dutch Oven Bread Recipe You’ll Love Today!, it’s easy to encounter some common pitfalls. Here are a few mistakes to watch out for.
- Incorrect yeast measurement: Using too much or too little yeast can affect the rise of your bread. Always measure accurately for the best results.
- Not letting the dough rest enough: Skipping the resting period can lead to dense bread. Allow the dough to rise for at least 12 hours for optimal texture.
- Overheating the Dutch oven: If the Dutch oven is too hot when you add the dough, it may burn. Preheat it properly, but be cautious not to overdo it.
- Skipping the olive oil: Not adding olive oil can result in sticking and uneven cooking. Make sure to coat the bottom of your Dutch oven generously.
- Opening the lid too soon: Lifting the lid while baking can cause your bread to collapse. Keep it covered for at least 30 minutes before checking on it.
Storage & Reheating Instructions
Refrigerator Storage
- Store leftover bread in an airtight container or wrap it tightly in plastic wrap.
- It will last up to 3 days in the fridge.
Freezing Garlic Herb Dutch Oven Bread Recipe You’ll Love Today!
- Wrap individual slices or whole loaves in plastic wrap and then foil.
- Freeze for up to 3 months for best freshness.
Reheating Garlic Herb Dutch Oven Bread Recipe You’ll Love Today!
- Oven: Preheat your oven to 350°F (175°C) and warm for about 10-15 minutes.
- Microwave: Use medium power for 10-15 seconds, checking frequently to avoid drying out.
- Stovetop: Heat a skillet over low heat and warm each slice for a few minutes on each side.
Frequently Asked Questions
Here are some frequently asked questions about the Garlic Herb Dutch Oven Bread Recipe You’ll Love Today!
Can I use different herbs in this recipe?
Yes! Feel free to experiment with other herbs like basil or oregano for different flavors.
What should I do if my dough is too sticky?
If your dough is sticky, gradually add more flour until it reaches a manageable consistency.
How can I enhance the flavor of my garlic herb bread?
Adding cheese or extra garlic can elevate this recipe’s flavor profile beautifully.
Is this Garlic Herb Dutch Oven Bread Recipe You’ll Love Today! suitable for beginners?
Absolutely! This recipe is straightforward and perfect for those new to baking bread.
Final Thoughts
The Garlic Herb Dutch Oven Bread Recipe You’ll Love Today! is not only delicious but also versatile. You can customize it by adding your favorite ingredients, such as cheese or nuts. Whether served with soup or enjoyed on its own, this bread will surely impress your family and friends.
Garlic Herb Dutch Oven Bread Recipe You’ll Love Today!

Garlic Herb Dutch Oven Bread is a delightful and easy-to-make addition to any meal. This rustic bread features a crispy crust and a soft, airy interior infused with aromatic garlic and fresh herbs. Perfect for family dinners, potlucks, or as a standalone snack, this recipe requires minimal effort and ingredients. Baking in a Dutch oven ensures an even bake while creating that coveted golden crust. With a long resting period to develop flavor, you’ll impress your guests without spending all day in the kitchen!
- Prep Time: 10 minutes
- Cook Time: 45 minutes
- Total Time: 55 minutes
- Yield: Approximately 12 servings 1x
- Category: Bread
- Method: Baking
- Cuisine: American
Ingredients
- 3 cups all-purpose flour
- 1 ½ teaspoons salt
- ½ teaspoon instant yeast
- 1 ½ cups warm water
- 1 tablespoon olive oil
- 4 cloves garlic, minced
- 2 tablespoons fresh herbs (like rosemary and thyme), chopped
Instructions
- In a large bowl, combine flour, salt, and yeast.
- Add warm water, minced garlic, and chopped herbs; mix until shaggy dough forms.
- Cover with plastic wrap; let rest at room temperature for 12-18 hours.
- Preheat the oven to 450°F (230°C) with the Dutch oven inside.
- Carefully remove the hot Dutch oven; drizzle olive oil at the bottom.
- Shape the dough into a ball on a floured surface; place in the Dutch oven.
- Cover and bake for 30 minutes; then uncover and bake for another 15-20 minutes until golden brown.
- Cool on a wire rack before slicing.
Nutrition
- Serving Size: 1 slice (67g)
- Calories: 170
- Sugar: 0.5g
- Sodium: 210mg
- Fat: 2g
- Saturated Fat: 0.5g
- Unsaturated Fat: 1g
- Trans Fat: 0g
- Carbohydrates: 34g
- Fiber: 1g
- Protein: 5g
- Cholesterol: 0mg