Red, White and Blue Dirt Cups
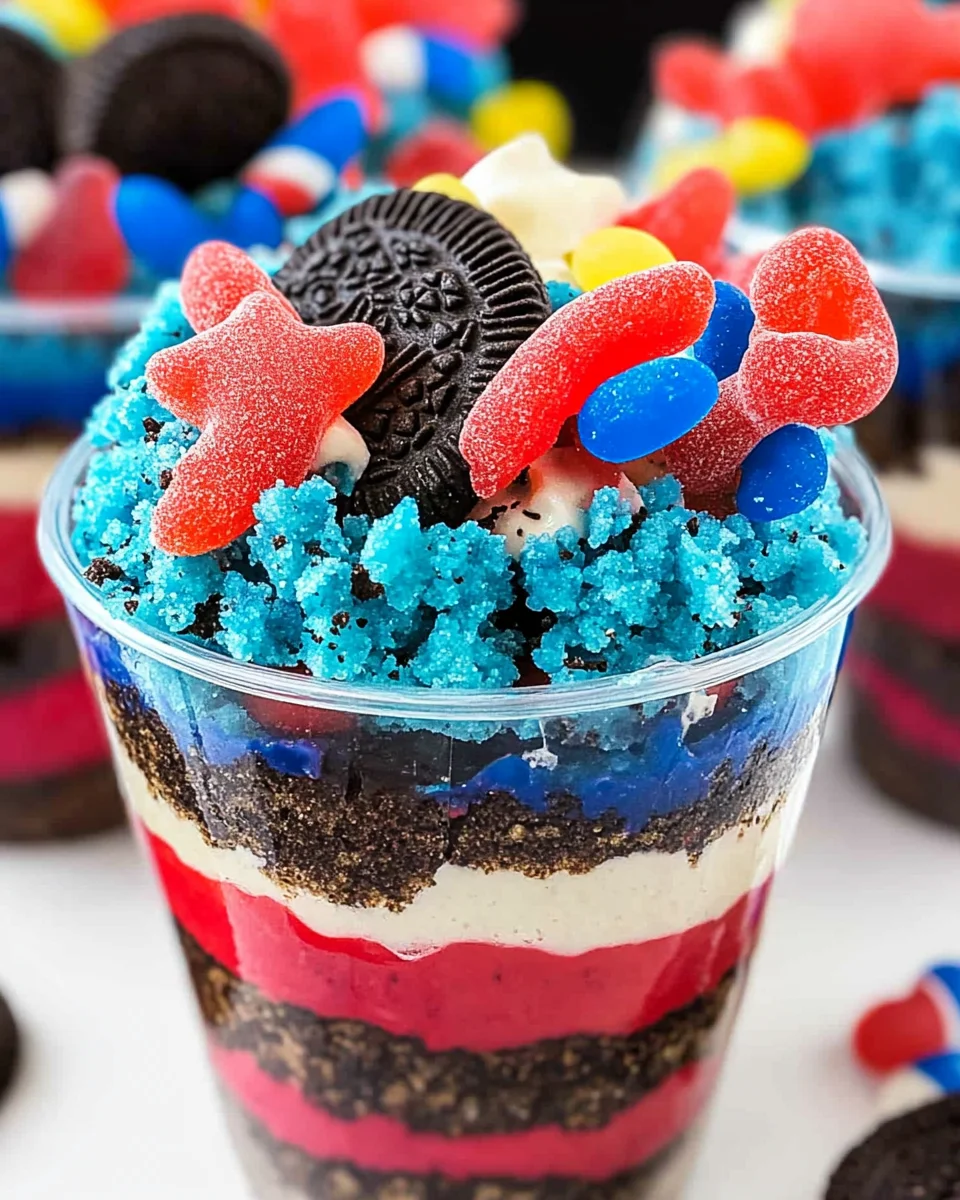
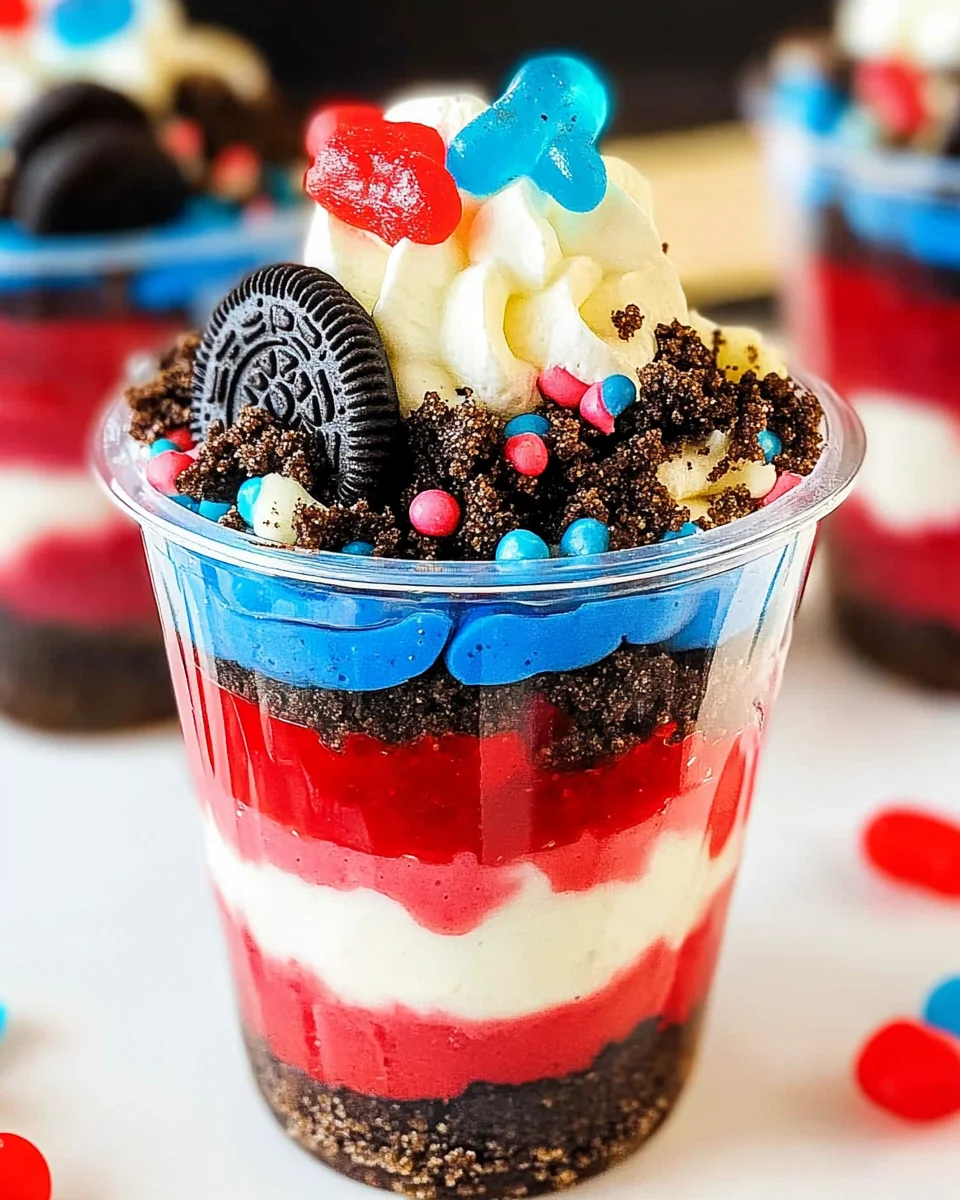
Easy no-bake Red, White and Blue Dirt Cups are a delightful treat perfect for any summer celebration, especially the 4th of July! With layers of creamy cheesecake pudding, crushed Oreos, and colorful gummy worms, these cups not only look festive but are also simple to make. They are ideal for kids and adults alike, making them a versatile dessert for barbecues, picnics, or family gatherings.
Why You’ll Love This Recipe
- Quick and Easy: This recipe requires no baking and can be prepared in just 10 minutes.
- Kid-Friendly: Children love the fun colors and textures, making it a perfect project for little helpers.
- Festive Presentation: The vibrant layers of red, white, and blue create an eye-catching dessert that’s great for celebrations.
- Customizable: You can easily swap out the gummy worms or add different candies to suit your taste.
- Delicious Layers: The combination of creamy pudding and crunchy Oreos makes every bite irresistible.
Tools and Preparation
Before you start whipping up these delicious Red, White and Blue Dirt Cups, gather your tools to ensure a smooth process.
Essential Tools and Equipment
- Mixing bowls
- Whisk
- Plastic cups
- Measuring cups
- Spoon
Importance of Each Tool
- Mixing bowls: Essential for combining ingredients effectively without spills.
- Whisk: Great for achieving a smooth pudding texture quickly.
- Plastic cups: Perfect for layering the dessert while allowing easy serving.
Ingredients
To create your own delicious Red, White and Blue Dirt Cups, gather the following ingredients:
For the Pudding Layers
- 2 boxes cheesecake pudding (3.4 ounces each)
- 4 cups milk
For the Crunchy Layer
- 19 Oreo cookies (crushed)
For Coloring
- ¼ teaspoon red gel food dye
- ¼ teaspoon blue gel food dye
For Topping
- 8 red and blue gummy worms
How to Make Red, White and Blue Dirt Cups
Step 1: Prepare the Pudding Mixture
- Place both boxes of pudding in a large mixing bowl.
- Add the milk and whisk until the pudding has thickened.
Step 2: Divide the Pudding
- Pour 1 cup of the pudding into a separate bowl.
- Transfer 1 ½ cups of pudding into another bowl.
Step 3: Add Food Coloring
- To the bowl with 1 cup of pudding, add the blue gel dye.
- Stir until completely mixed for an even color.
- In the bowl with 1 ½ cups of pudding, add the red gel dye.
- Mix thoroughly until fully combined.
Step 4: Assemble Your Cups
- Line up your plastic cups on a flat surface.
- Place 1 tablespoon of crushed Oreos in the bottom of each cup and spread evenly.
- Add 2 tablespoons of blue pudding on top of the Oreos and gently spread it out.
Step 5: Continue Layering
- Add another tablespoon of crushed Oreo over the blue pudding layer and spread evenly.
- Next, layer 3 tablespoons of white pudding on top and spread evenly.
- Follow with another layer of 1 ½ tablespoons of white pudding; ensure it’s spread out evenly.
Step 6: Finalize with Red Pudding
- Top off with 4 tablespoons of red pudding as your final layer.
- Finish with another tablespoon or two of crushed Oreos on top.
Step 7: Garnish
- Place two gummy worms on each cup as decoration.
- Optionally add a small flag per cup to enhance presentation before serving.
Enjoy your deliciously festive Red, White and Blue Dirt Cups as you celebrate summer occasions!
How to Serve Red, White and Blue Dirt Cups
These festive Red, White and Blue Dirt Cups are perfect for any summer gathering, especially on the 4th of July. Here are some fun ways to serve them that will delight your guests.
Individual Cups
- Serve each cup in its own clear plastic cup to showcase the beautiful layers.
- Add a small American flag or themed topper for a patriotic touch.
Family Style
- Arrange several cups on a large platter for a family-style dessert option.
- Garnish with fresh strawberries and blueberries around the cups for extra color.
Dessert Bar
- Create a dessert bar with Red, White and Blue Dirt Cups as the centerpiece.
- Offer toppings like whipped cream, extra gummy worms, or chocolate sprinkles for guests to customize their cups.
Picnic Treats
- Pack individual cups in a cooler for an outdoor picnic.
- Make sure to use secure lids to prevent spills during transport.
How to Perfect Red, White and Blue Dirt Cups
For the best results when making your Red, White and Blue Dirt Cups, consider these helpful tips.
- Use fresh ingredients: Ensure your milk is fresh and pudding mix is not expired for the best flavor.
- Chill before serving: Refrigerate the cups for at least 30 minutes before serving so they set nicely.
- Layer carefully: Take your time when layering the pudding and Oreos for a neat presentation.
- Experiment with colors: Feel free to add more dye for vibrant layers or use other colors for different occasions.
- Make ahead of time: Prepare these cups a day in advance; they taste even better after sitting in the fridge overnight.
- Customize flavors: Swap out cheesecake pudding with vanilla or chocolate if you prefer different flavors.
Best Side Dishes for Red, White and Blue Dirt Cups
Pair your delicious Red, White and Blue Dirt Cups with these delightful side dishes that complement this sweet treat perfectly.
- Grilled Corn on the Cob: Sweet corn brushed with butter makes for a classic summer side.
- Caprese Salad Skewers: Fresh tomatoes, mozzarella balls, and basil drizzled with balsamic glaze offer a refreshing bite.
- Fruit Salad: A mix of seasonal fruits adds brightness and balances the sweetness of the dirt cups.
- Potato Salad: Creamy potato salad gives guests a hearty option alongside dessert.
- Veggie Platter: Crisp vegetables served with ranch dip provide crunch and freshness.
- Baked Beans: Sweet baked beans bring a warm comfort food element to your spread.
- Pasta Salad: Colorful pasta salad tossed in Italian dressing complements the festive theme well.
- Coleslaw: Crunchy coleslaw adds a tangy contrast that pairs nicely with sweets.
Common Mistakes to Avoid
Making Red, White and Blue Dirt Cups can be fun and easy, but it’s important to avoid common mistakes that could ruin your dessert.
- Not measuring ingredients accurately: Always use the right amounts for each ingredient. This ensures the pudding thickens properly and layers hold together.
- Skipping the chilling time: Allowing the pudding to set in the fridge is crucial. If you skip this step, your layers may not stay distinct.
- Overmixing the pudding: Mix just until combined. Overmixing can lead to a watery consistency which won’t hold well in cups.
- Forgetting to layer properly: Layering is key for presentation! Take your time to spread each layer evenly for a beautiful dessert.
- Using stale Oreos: Fresh Oreos are essential for that crunchy texture. Check your cookies’ freshness before using them in your dirt cups.
Storage & Reheating Instructions
Refrigerator Storage
- Store the cups covered in plastic wrap or an airtight container.
- They can last in the refrigerator for up to 3 days.
Freezing Red, White and Blue Dirt Cups
- These cups can be frozen, but it may change the texture of the pudding.
- Freeze them for up to a month in freezer-safe containers.
Reheating Red, White and Blue Dirt Cups
- Oven: Not recommended as it will melt the layers.
- Microwave: Use low power to gently warm; avoid overheating.
- Stovetop: Not applicable as these are meant to be served cold.
Frequently Asked Questions
Here are some common questions regarding Red, White and Blue Dirt Cups and their answers.
Can I make Red, White and Blue Dirt Cups ahead of time?
Yes, you can prepare these cups up to a day in advance. Just store them in the refrigerator until serving.
What other toppings can I use besides gummy worms?
You can use mini flags, sprinkles, or even fresh fruit like strawberries or blueberries for added flair.
How do I customize my Red, White and Blue Dirt Cups?
Feel free to swap out Oreo cookies with other cookie types or add flavored pudding mixes for different tastes.
Are Red, White and Blue Dirt Cups suitable for gluten-free diets?
Using gluten-free Oreos makes this dessert suitable for gluten-free diets. Always check labels!
Final Thoughts
These Red, White and Blue Dirt Cups are a delightful treat perfect for summer celebrations. Their vibrant layers create visual appeal while offering a delicious combination of flavors. Don’t hesitate to customize them with your favorite toppings or pudding flavors; they’re versatile enough for any occasion!
Red, White and Blue Dirt Cups
Red, White and Blue Dirt Cups are a delightful no-bake dessert that brings festive cheer to any summer celebration, especially the 4th of July. These colorful cups feature layers of creamy cheesecake pudding, crunchy crushed Oreos, and vibrant gummy worms, making them not only visually appealing but also incredibly easy to whip up. Perfect for both kids and adults, they can be prepared in just minutes and customized to suit your taste. Whether you’re hosting a barbecue or attending a picnic, these fun dessert cups will be the highlight of the occasion!
- Prep Time: 10 minutes
- Cook Time: None
- Total Time: 0 hours
- Yield: Serves approximately 6 cups 1x
- Category: Dessert
- Method: No-bake
- Cuisine: American
Ingredients
- 2 boxes cheesecake pudding (3.4 ounces each)
- 4 cups milk
- 19 Oreo cookies (crushed)
- ¼ teaspoon red gel food dye
- ¼ teaspoon blue gel food dye
- 8 red and blue gummy worms
Instructions
- In a mixing bowl, combine both boxes of pudding with the milk. Whisk until thickened.
- Divide the pudding into two bowls: 1 cup in one bowl and 1 ½ cups in another.
- To the first bowl, add blue gel dye; mix well. To the second bowl, add red gel dye; stir until fully blended.
- Layer the dessert in clear plastic cups: start with a tablespoon of crushed Oreos, then add 2 tablespoons of blue pudding.
- Repeat layering with another tablespoon of Oreos followed by 3 tablespoons of white pudding.
- Finish with red pudding on top and garnish with gummy worms.
Nutrition
- Serving Size: 1 cup (150g)
- Calories: 250
- Sugar: 18g
- Sodium: 230mg
- Fat: 11g
- Saturated Fat: 6g
- Unsaturated Fat: 4g
- Trans Fat: 0g
- Carbohydrates: 35g
- Fiber: 1g
- Protein: 3g
- Cholesterol: 15mg