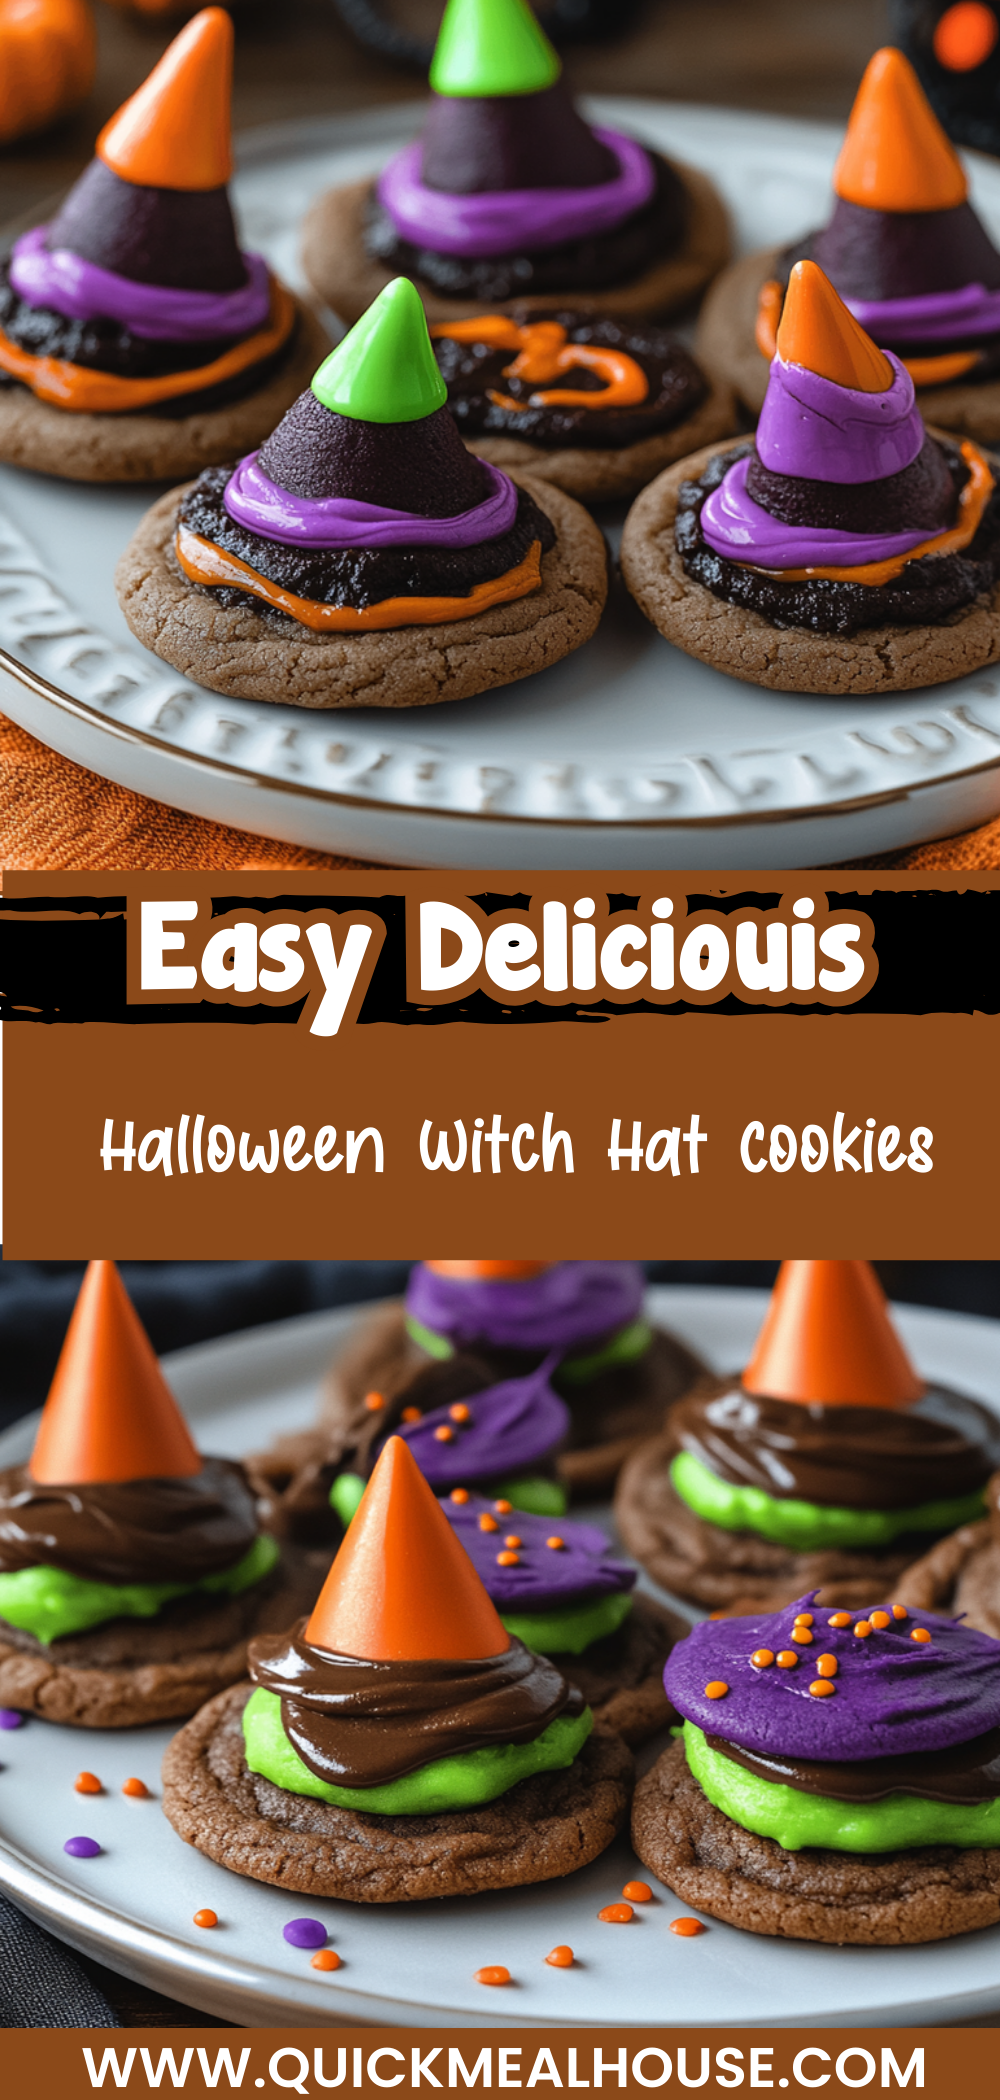
Spooktacular Halloween Witch Hat Cookies Recipe
There’s something truly magical about Halloween, isn’t there? From the crisp autumn air to the excitement of costumes and treats, it’s a time for creativity and fun. These Halloween Witch Hat Cookies are perfect for getting into the spooky spirit. They’re not only delicious but also a fantastic project to enjoy with family and friends. Whether you’re hosting a party or just want to whip up some festive treats, these cookies will surely impress all your little ghouls and goblins.
What I love most about this recipe is how customizable it is! You can play around with colors and decorations, making each cookie unique. Plus, they are sure to be a hit at any gathering, providing both sweetness and a touch of whimsy that everyone will adore.
Why You’ll Love This Recipe
– Fun to make: These cookies are an engaging activity for kids and adults alike.
– Customizable designs: Get creative with colors and decorations for a personalized touch.
– Delightfully chocolaty: The combination of cake mix and chocolate cookies creates a rich flavor.
– Perfect for parties: Whether it’s Halloween or any festive gathering, these cookies add flair to your dessert table.
– Easy to share: With 12 servings, there’s plenty to go around—or to keep all for yourself!
Ingredients You’ll Need
Gathering your ingredients is part of the fun! Here’s what you’ll need to create these enchanting Halloween Witch Hat Cookies:
For the Cookies
– Favorite Cake Mix or Try Wilton’s Chocolate Cake Recipe
– Store Bought Chocolate Cookies or Try This Recipe from Wilton
– Sugar Cones
For the Frosting & Decoration
– Creamy White Decorator Icing, 4 lb. Tub
– Lemon Yellow Icing Color
– Black Color Mist Food Coloring Spray
– Rose Icing Colors Pink Food Coloring
– Violet Icing Color, Gel Food Coloring
– Golden Yellow Icing Color
– Orange Icing Color
Variations
One of the best things about baking is that you can easily adapt recipes based on preferences or what you have on hand. Here are some ideas to get your creativity flowing:
– Swap the cake mix: Use any cake mix flavor you prefer—vanilla or red velvet could be fun twists!
– Change up the colors: Feel free to experiment with different food coloring shades for unique styles.
– Try different cookie bases: Instead of chocolate cookies, use vanilla or even gingerbread for a seasonal twist.
– Add sprinkles: Top off your witch hats with festive sprinkles or edible glitter for extra flair!
How to Make Halloween Witch Hat Cookies
These cookies might look intricate, but they come together quite simply. Follow these steps closely, and you’ll have a batch of delightful witch hats in no time!
Step 1: Prepare & Bake the Cones
Start by preparing your cake mix according to the instructions provided by your chosen recipe. This step is crucial as it ensures your cones come out fluffy and delicious. Place your Cupcake Cones Baking Rack on a cookie sheet and insert the sugar cones into it. Fill each cone with approximately 2 tablespoons of cake batter. Bake them as per the timing instructions from your recipe and then allow them to cool completely.
Step 2: Spray the Cones
Once your cones have cooled down, it’s time for some spooky magic! If needed, carefully trim any risen cake from the tops of the cones using a knife so they sit flat. Lay them wide side down on parchment paper and spray them with Black Color Mist. This fun step adds that iconic witchy aesthetic—let them dry for about 10 to 15 minutes before moving on.
Step 3: Tint the Icing & Prepare the Bags
Next up is creating those vibrant icing colors! Start by tinting 1 cup of creamy white decorator icing orange. Then, mix violet and rose icing colors together to create purple icing; again, use about 1 cup. For added detail, tint ¼ cup of icing yellow by combining golden yellow and lemon yellow colors. Prepare three decorating bags with tips attached—two filled with orange and purple icing (using tip 2B) and one filled with yellow icing (using tip 3).
Step 4: Assemble the Witch Hats
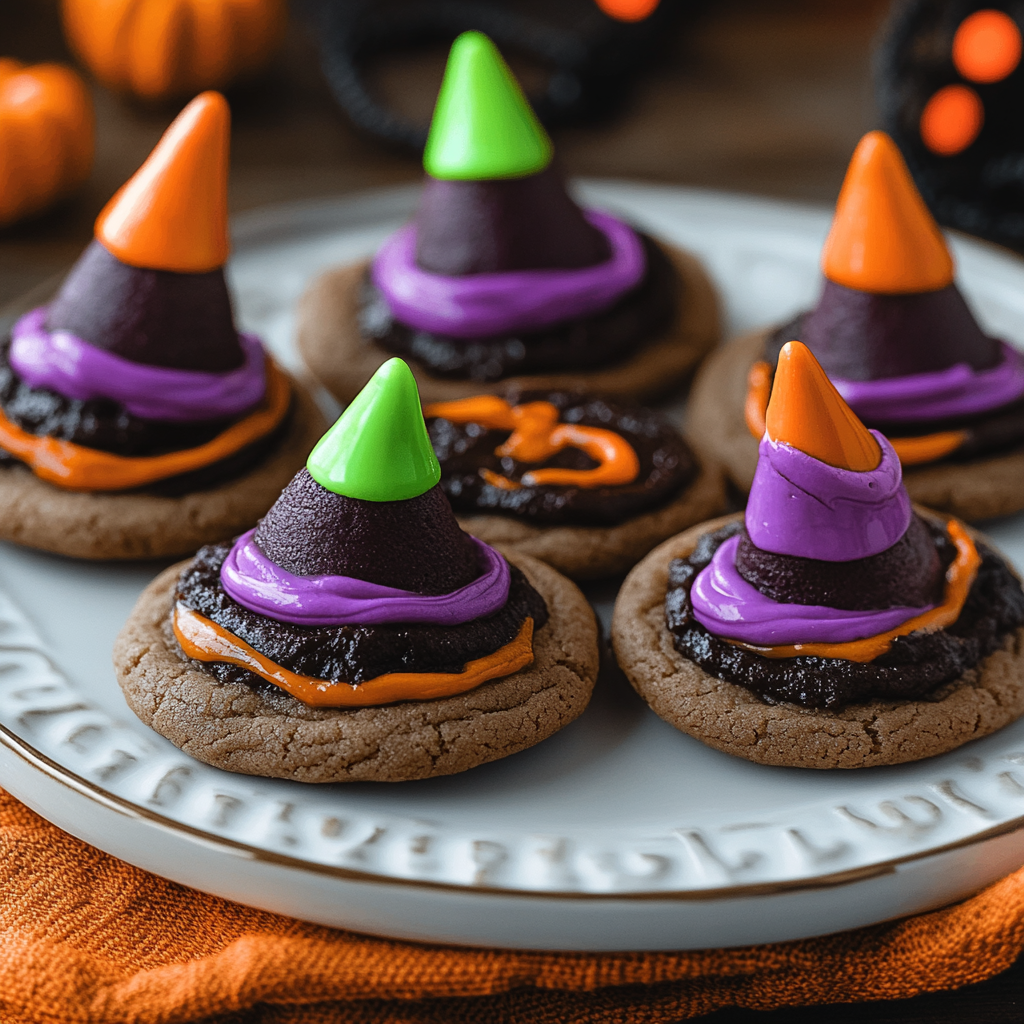
Now comes the fun part—assembly! Begin by using your orange icing to pipe a small amount in the center of each chocolate cookie before placing a cone on top. This helps secure everything together beautifully! With the smooth side of tip facing outwards, pipe a decorative band around half of the wide ends of the cones; use a spatula to smooth it out if necessary. Repeat this process using purple icing on the remaining cookies and cones but remember to let them set for about 15 to 20 minutes after finishing.
Finally, grab that bag filled with yellow icing and pipe little buckles around each band on your hats. Allow everything to set once more for another 15 to 20 minutes before enjoying these delightful Halloween Witch Hat Cookies!
Pro Tips for Making Halloween Witch Hat Cookies
Making Halloween Witch Hat Cookies can be such a delightful experience, especially when you have a few handy tips up your sleeve. These pointers will help you achieve the best results and enjoy the process even more.
– Use a quality cake mix: A good cake mix can make all the difference in flavor and texture. Opt for your favorite brand or try Wilton’s Chocolate Cake Recipe for an extra chocolaty treat.
– Ensure even baking: When filling the sugar cones, try to keep the batter level to ensure even baking. This way, your cones will rise uniformly and look fantastic.
– Experiment with colors: Don’t hesitate to get creative with icing colors! Mixing different shades can make each witch hat unique and add a fun touch to your presentation.
– Use parchment paper: Lining your baking sheets with parchment paper will help prevent sticking and make cleanup a breeze. Plus, it provides a clean surface for decorating.
– Let them set: Allowing the decorated cookies to set properly ensures that the icing hardens slightly, making them easier to handle without smudging.
How to Serve Halloween Witch Hat Cookies
These Halloween Witch Hat Cookies are not just delicious but also visually striking, making them perfect for any spooky gathering. Presenting them in an enticing way can elevate your dessert table and delight your guests.
Garnishes
– Edible glitter: A sprinkle of edible glitter can give your witch hats that extra sparkle under dim Halloween lights.
– Candy eyeballs: Placing candy eyeballs on top of the cookies adds a fun and whimsical touch that kids (and adults) will love.
Side Dishes
– Pumpkin spice cupcakes: These sweet treats complement the chocolatey flavors of the witch hats perfectly.
– Ghostly meringues: Light and airy, these meringues add a lovely contrast in texture while keeping with the Halloween theme.
– Candy corn mix: A vibrant bowl of candy corn blends well visually with your cookies and provides additional sweet bites for guests.
Make Ahead and Storage
Preparing ahead of time can save you stress on Halloween night, allowing you to enjoy the festivities. Here’s how to store or freeze your Halloween Witch Hat Cookies effectively.
Storing Leftovers
– Keep cookies in an airtight container at room temperature for up to 3 days to maintain freshness.
– If you live in a humid area, place a piece of parchment paper between layers to avoid sticking.
Freezing
– Freeze unassembled cookies (cookies without cones) in an airtight container for up to 2 months. This way, you can assemble them later fresh!
– Wrap each cookie tightly in plastic wrap before placing them in a container for added protection from freezer burn.
Reheating
– For best results, allow frozen cookies to thaw at room temperature before decorating.
– If needed, gently warm leftover cookies in a microwave for about 5 seconds before serving; they’ll taste like they were just made!
FAQs
Have questions about making Halloween Witch Hat Cookies? You’re not alone! Here are some common queries answered:
Can I use gluten-free cake mix?
Absolutely! You can substitute any gluten-free cake mix for this recipe. Just follow the instructions on the package as directed.
How long do these cookies last?
When stored properly in an airtight container at room temperature, these cookies typically stay fresh for up to 3 days. Enjoy them while they’re at their best!
Can I use other flavors of cake mix?
Definitely! While chocolate is classic, feel free to experiment with other flavors like vanilla or pumpkin spice. It will give your witch hats an interesting twist!
What if I don’t have decorating bags?
If you don’t have decorating bags on hand, you can use resealable plastic bags instead. Just snip off one corner and pipe as usual.
Final Thoughts
I hope you’re excited to whip up these delightful Halloween Witch Hat Cookies! They are sure to bring smiles to everyone’s faces at your Halloween gatherings. So gather your ingredients, invite some friends or family over, and let the fun begin! Enjoy creating these sweet treats this spooky season!
Halloween Witch Hat Cookies
Ingredients
Method
- Prepare your cake mix according to the instructions provided by your chosen recipe. Place your Cupcake Cones Baking Rack on a cookie sheet and insert the sugar cones into it. Fill each cone with approximately 2 tablespoons of cake batter. Bake them as per the timing instructions from your recipe and then allow them to cool completely.
- Once your cones have cooled down, carefully trim any risen cake from the tops of the cones using a knife so they sit flat. Lay them wide side down on parchment paper and spray them with Black Color Mist. Let them dry for about 10 to 15 minutes.
- Tint 1 cup of creamy white decorator icing orange. Mix violet and rose icing colors together to create purple icing; again, use about 1 cup. For added detail, tint ¼ cup of icing yellow by combining golden yellow and lemon yellow colors. Prepare three decorating bags with tips attached—two filled with orange and purple icing and one filled with yellow icing.
- Use your orange icing to pipe a small amount in the center of each chocolate cookie before placing a cone on top. Pipe a decorative band around half of the wide ends of the cones with orange icing. Repeat this process using purple icing on the remaining cookies and cones. Allow everything to set for another 15 to 20 minutes before enjoying.