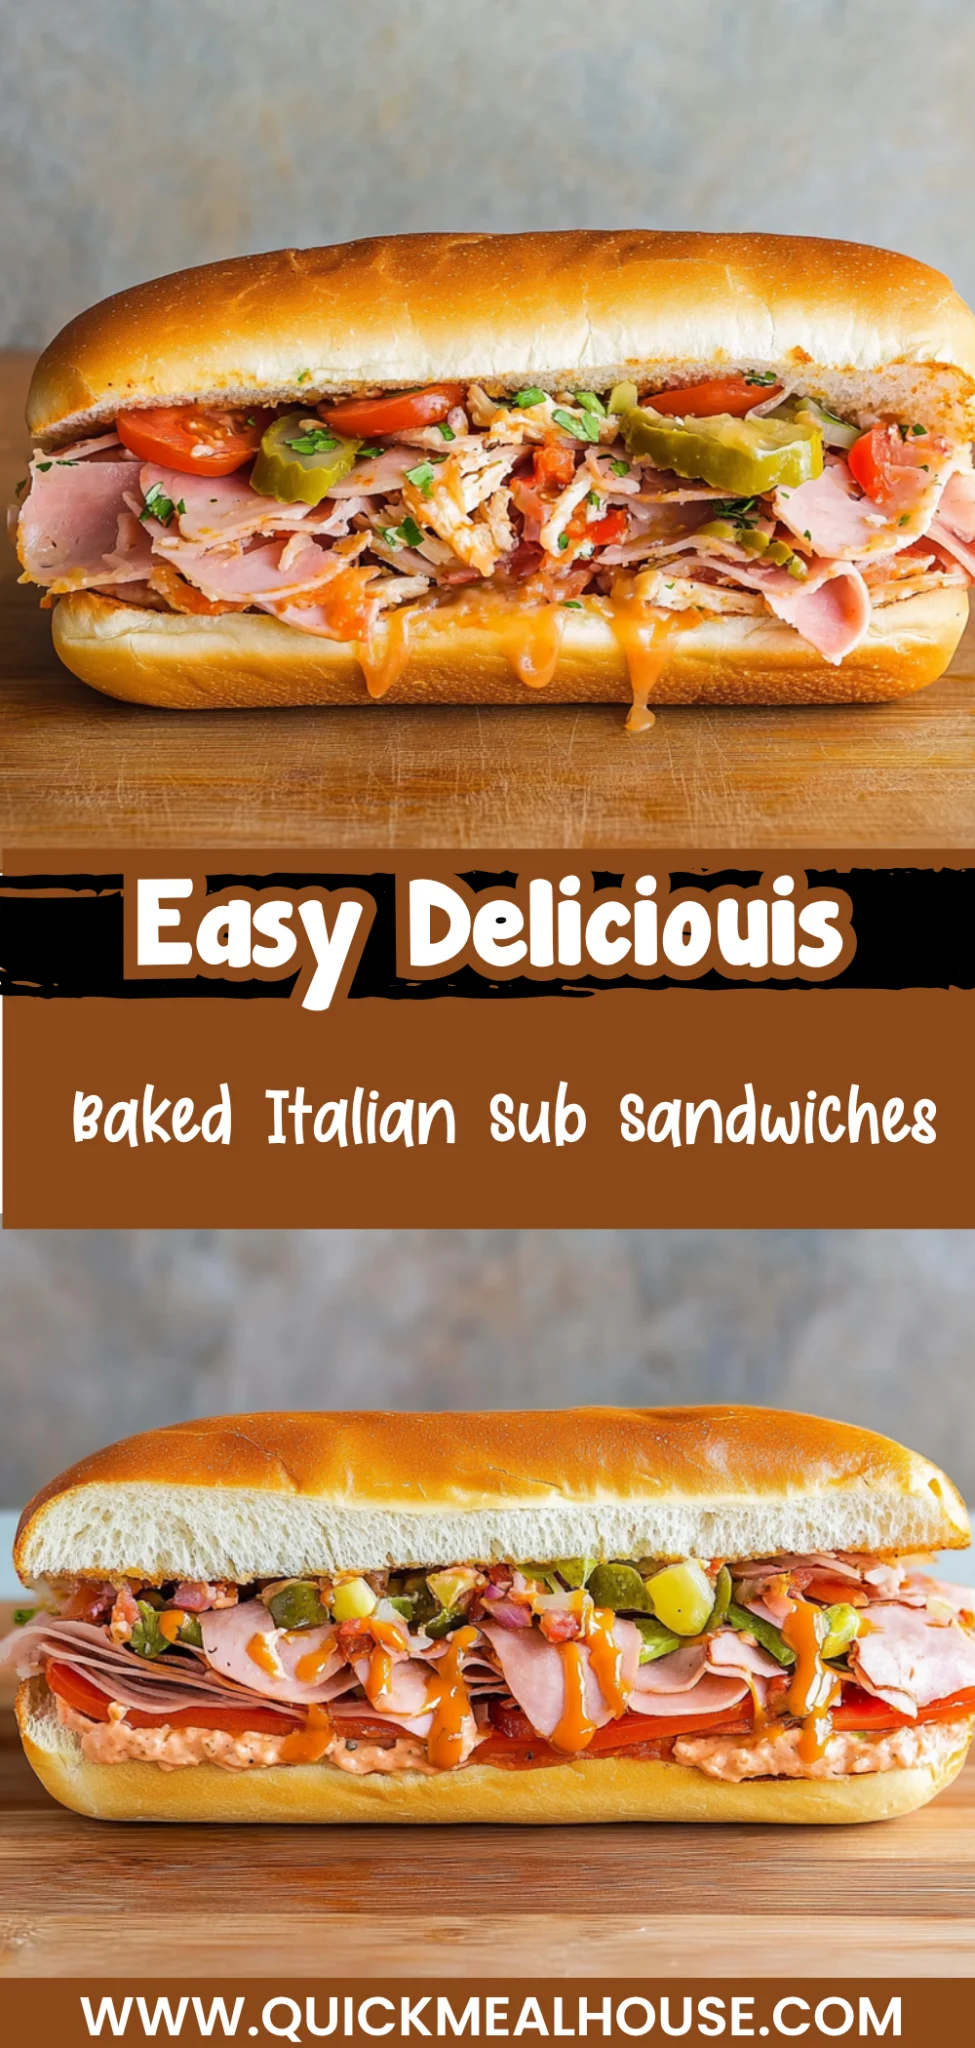
Baked Italian Sub Sandwiches: Comforting and Cheesy Delight
Imagine sinking your teeth into a warm, golden-brown Baked Italian Sub Sandwich, where layers of savory meats mingle with gooey melted cheese, all enveloped in soft, crusty bread. The enticing aroma of Italian herbs wafts through the air, beckoning you to gather around the table for a comforting meal that feels both indulgent and familiar, perfect for busy weeknights or casual gatherings with loved ones.
What sets these sandwiches apart is their delightful combination of flavors and textures, enhanced by a secret blend of Italian seasonings that elevates each bite. A touch of crispy pepperoncini adds a zingy contrast to the richness of the cheeses and meats, creating a harmonious balance that’s hard to resist. Serve them hot from the oven, and you’ll create a moment worth sharing — one that invites everyone to come together and savor the joy of good food.
Why You’ll Love This Baked Italian Sub Sandwiches
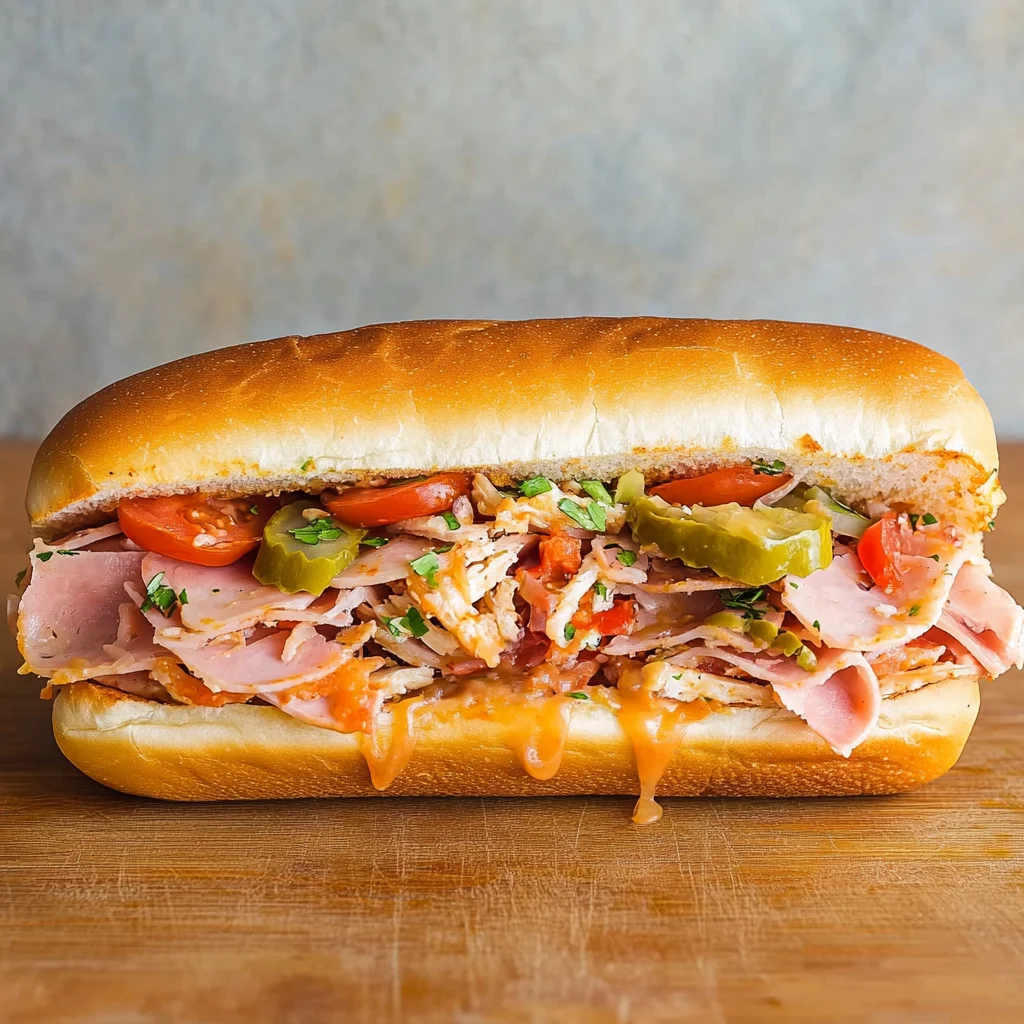
These Baked Italian Sub Sandwiches are a culinary masterpiece that combines a symphony of flavors and textures, making every bite an absolute delight. The crunchy crust of the sub rolls perfectly contrasts with the rich, melty provolone cheese and the savory layers of salami, ham, and pepperoni, creating a satisfying mouthfeel that will keep you coming back for more. Topped with a sprinkle of aromatic Parmesan and a hint of garlic, each sandwich is not only visually appealing but also bursts with authentic Italian flavors enhanced by the freshness of shredded lettuce, juicy tomato slices, and tangy banana peppers. With such a wonderful balance of taste and texture, you’ll find it impossible to resist whipping up these sandwiches tonight!
What Kind of Sub Rolls Should I Use?
For the best results in your Baked Italian Sub Sandwiches, opt for fresh Italian or hoagie rolls. These types of bread are ideal because they are sturdy enough to hold up against the hearty fillings without getting soggy, while also providing a soft, chewy texture that complements the savory meats and melted cheese. The slightly crusty exterior adds a delightful crunch when baked, enhancing the overall eating experience. If you can’t find Italian or hoagie rolls, French bread can serve as a suitable alternative; just be mindful to adjust baking time slightly, as it may cook faster due to its thinner crust.
Ingredients for the Baked Italian Sub Sandwiches
Each ingredient in this dish plays an essential role in flavor and texture. Here’s what you’ll need:
- 4 pieces sub rolls (Italian or hoagie rolls): The hearty base that holds all the delicious fillings together.
- 8 ounces sliced salami: Adds a rich, savory flavor with a hint of spice.
- 8 ounces sliced ham: Contributes a mild sweetness and tender texture.
- 8 ounces sliced pepperoni: Introduces a zesty kick and robust flavor.
- 8 ounces sliced provolone cheese: Melts beautifully to create a creamy, gooey layer.
- 1 cup shredded lettuce: Provides a refreshing crunch that balances the richness.
- 1 medium tomato (sliced): Offers juicy freshness and a touch of acidity.
- 1/2 cup banana peppers (sliced): Delivers a tangy heat that brightens the sandwich.
How To Make the Baked Italian Sub Sandwiches
Preheat the Oven
Start by preheating your oven to 375°F (190°C). This temperature is ideal for ensuring that your sandwiches bake evenly and the cheese melts beautifully, creating a deliciously gooey texture.
Slice the Sub Rolls
Carefully slice each sub roll in half lengthwise, ensuring not to cut all the way through. This will create a hinge that keeps your fillings secure and makes it easier to handle the sandwiches once they’re assembled.
Drizzle Olive Oil
Drizzle a tablespoon of olive oil generously on the inside of each roll. The oil will help to keep the bread moist while baking and adds a layer of flavor that enhances the overall taste of your sub sandwiches.
Layer the Meats and Cheese
Begin layering the sliced salami, ham, pepperoni, and provolone cheese evenly inside each roll. Aim for a balanced distribution of meats and cheese so every bite is packed with savory goodness.
Season the Fillings
Sprinkle a teaspoon of Italian seasoning, half a teaspoon of garlic powder, and a quarter teaspoon of black pepper over the layered fillings. This seasoning blend will infuse your sandwiches with classic Italian flavors as they bake.
Add Fresh Toppings
Top each sandwich with a cup of shredded lettuce, slices from one medium tomato, and half a cup of banana peppers. Finally, sprinkle a quarter cup of grated Parmesan cheese over everything for an extra touch of richness before closing them up.
Wrap and Prepare for Baking
Wrap each sandwich individually in aluminum foil and place them on a baking sheet. This wrapping method ensures that the sandwiches steam slightly while baking, helping to melt the cheese perfectly without drying out the bread.
Bake Until Golden
Place your baking sheet in the preheated oven and bake for 15-20 minutes. Look for visual cues like melted cheese bubbling out from the rolls and lightly toasted bread edges—this indicates that your sandwiches are ready to come out.
Unwrap and Serve Warm
Once baked, carefully remove the sandwiches from the oven and unwrap them from their foil. If you prefer smaller portions or easier handling, slice each sandwich in half before serving warm—ideal for enjoying right away!
How to Serve and Store Baked Italian Sub Sandwiches
These baked Italian sub sandwiches serve 4 and are best enjoyed fresh out of the oven. For a satisfying meal, serve them alongside a crisp Caesar salad or a side of marinara sauce for dipping. You might also consider adding some crunchy potato chips on the plate to complement the soft, gooey texture of the sandwiches, creating a delightful contrast that will have everyone coming back for more.
To store any leftovers, place the sandwiches in an airtight container in the refrigerator where they can last for up to 3 days. When reheating, wrap each sandwich in foil and bake them at 350°F (175°C) for about 10-15 minutes; this method helps keep the bread crusty while warming the fillings evenly. While these sandwiches are best enjoyed fresh, they can be frozen for up to a month, though the texture of the bread may change slightly upon thawing and reheating.
Garlic Bread
Toasted garlic bread, with its crispy texture and rich buttery flavor, perfectly complements the savory meats and cheeses of Baked Italian Sub Sandwiches.
Caprese Salad
A fresh Caprese salad, with ripe tomatoes, creamy mozzarella, and fragrant basil, offers a refreshing contrast to the hearty richness of the sub sandwiches.
Roasted Potatoes
Crispy roasted potatoes seasoned with Italian herbs provide a satisfying crunch that pairs wonderfully with the soft, warm sub rolls.
Coleslaw
Tangy and crunchy coleslaw adds a delightful crunch that cuts through the richness of the meats and cheese in your sandwich.
Antipasto Platter
An antipasto platter filled with olives, marinated vegetables, and assorted cured meats enhances the Italian flavors while offering a variety of textures.
Grilled Zucchini
Tender grilled zucchini drizzled with olive oil brings a light and smoky flavor that balances out the hearty filling of Baked Italian Sub Sandwiches.
Can I use a different type of cheese instead of provolone?
Absolutely! If you prefer a different flavor, mozzarella, gouda, or even pepper jack can work well in this recipe. Just keep in mind that the taste and melting quality may vary slightly.
Are these sandwiches gluten-free?
Unfortunately, traditional sub rolls are made with wheat flour, making them unsuitable for a gluten-free diet. However, you can substitute the rolls with gluten-free bread options available at many grocery stores.
Can I make these sandwiches ahead of time and freeze them?
Yes, you can assemble the sandwiches ahead of time and wrap them tightly in foil before freezing. When you’re ready to enjoy them, simply bake from frozen at 375°F (190°C) for about 25-30 minutes.
How do I know when the sandwiches are done baking?
The sandwiches are done when the cheese is melted and bubbly, and the bread has a nice golden-brown color. You can unwrap one to check if the cheese has fully melted before serving.
Can I add more vegetables to my Italian sub sandwiches?
Definitely! Feel free to include additional veggies like sliced onions, bell peppers, or spinach for extra crunch and flavor. Just be mindful not to overload the sandwich to ensure it holds together while baking.
Wrapping It Up
Baked Italian Sub Sandwiches bring a delightful blend of flavors that are sure to impress your family and friends, making mealtime feel like a special occasion. If you’re looking for more delicious options, try out [Italian Meatball Subs] or [Cheesy Garlic Breadsticks] for a perfect pairing. We’d love to see your creations, so don’t forget to save this recipe on Pinterest and share your delicious results with our community!
Baked Italian Sub Sandwiches
Ingredients
Method
- Preheat the oven to 375°F (190°C).
- Slice the sub rolls in half lengthwise without cutting all the way through.
- Drizzle olive oil on the inside of each roll.
- Layer the salami, ham, pepperoni, and provolone cheese evenly inside each roll.
- Sprinkle Italian seasoning, garlic powder, and black pepper over the fillings.
- Top with shredded lettuce, sliced tomato, banana peppers, and grated Parmesan cheese.
- Wrap each sandwich in aluminum foil and place them on a baking sheet.
- Bake in the preheated oven for 15-20 minutes, or until the cheese is melted and the bread is toasted.
- Remove from the oven, unwrap, and slice in half if desired. Serve warm.